Thursday, May 26, 2011

We have a Winner!

Thank you all so much for all the encouraging and sweet comments during the Sew, Mama, Sew Giveaway Day! I was very fun to see which onesie was everyone's favorite! Out of 53 comments, Random.org picked the #43 & that was A Joyful Chaos with her comment:

A Joyful Chaos said...

they are both adorable and with a baby on the way I'm really hoping to win this one. I would have to go with the one for a girl.

Congrats & I hope you enjoy your onesie!

For everyone that entered I will be sending you a special email including a coupon code, so keep your eyes out for that! :-)

Have a great Memorial Day weekend!

~Stacy


Sunday, May 22, 2011

Giveaway Day!!

GIVEAWAY CLOSED!!

I'm so excited to participate in my first Sew, Mama, Sew! giveaway day & I'm so excited you are here!! Welcome to my craft blog! My name is Stacy & I am the owner of The Fancy Fritter on Etsy.

I am so excited to giveaway one of my appliqued onesies away today! You can choose one either for a girl or a boy.

For a girl, I have stitched a precious vintage hankie embroidered with pink flowers to the neckline of a 100% organic cotton pink onesie. You can pick any size 0-3 months-12 months.


 For a boy, a green and blue striped tie applique has been stitched onto the front of a 100% organic white onesie. You can choose any size 0-3 months-12 months.


I am working today on posting more sweet onesies in my shop, so be sure to check those out too! :-)

Here's how to enter the giveaway:
 Just leave a comment and tell me which onesie you would want! :-)

For an additional entries: (Leave a separate comment for each entry)
- Go to The Fancy Fritter & let me know your favorite item!
- Become a fan of The Fancy Fritter Facebook page & come back and let me know!

Giveaway will stay open until Thursday, May 26 at noon.

I hope you have a great day browsing through all the fun giveaways & I hope you win!

Have a great Monday!

Saturday, May 21, 2011

Old shelf to New shelf! (+Basket Liners)

I'm back!! Oh my..it has been way too long since I have posted on my craft blog! Since my last post, I found out I was pregnant, having a baby boy, & I am already 30 weeks! Now that we are all caught up, there has been lots of crafting going on lately, but not alot of energy to sit down & write about it, but I re-did a shelf last night & today, so I figured that would be a great way to jump back in! :-)

Here is the shelf that was a hand-me down from my older sister. It also came with 4 wicker baskets with different color liners (not that they were bad, just didn't go with my nursery theme).
(Please excuse the yucky garage background! HA!)

I bought one can of Rust-Oleum Satin Espresso spray paint and after sanding down the laminate on the shelf I sprayed on one good even coat.

I then took one of the old red basket liners that was already in the basket out & cut it apart to open it up and get a pattern. Mine measured 8.25in X 35 in. and then the bottom square was 8.25in X 9.25 in.


I then cut my light green gingham fabric those dimensions....

then sewed it all up & ended up with a snug fitting basket liner!


I repeated the same step again and then twice with my blue gingham fabric & created 4 new basket liners for my new shelf!

I love how it turned out! It will be the perfect little play area for him!

Soo...the total cost:
Shelf & Baskets :  FREE! :-)
Can of spray paint: $2.98
1 yard of Green Gingham: $4
1 yard of Blue Gingham: $3.75
Total: $10.73

Take that Pottery Barn Kids! HA!

Well, I'm excited to be back & to share some little crafts I've been doing in little man's nursery! I have been working to complete some other projects, so can't wait to show them off!

I'll also be having a giveaway with Sew, Mama, Sew! starting Monday to giveaway on of my appliqued onesies from my Etsy shop, so you'll have to drop back by next week & enter! :-)

Have a great weekend!

~Stacy

Thursday, July 8, 2010

Flower Canvas

I was wanting to make some type of artwork for my daughter's new bedroom and while browsing on Etsy I found the cutest little fabric flowers from Precocious Paper & the idea immediately popped in my head about what I wanted to do with them!

I wanted to paint a flower canvas! :-)

Here's my supplies:
One 16x20 stretched canvas
3 Craft paints in my matching colors (blue, green & pink)
6 Fabric Flowers from Precocious Paper
3 in foam brush & paintbrushes
Carbon paper


I first took my blue paint and using my foam brush painted the whole canvas blue. (It actually took 2 coats.)
Then I arranged my flowers out on the canvas to make sure they all fit! :-)
I also went ahead and played with Microsoft Word to create my letters. I used Scriptina font at about 200-225.  
I lined everything up nicely, then I started on my grass.
Using a small paintbrush, I just made small wispy strokes & Viola! You have grass!

Then using the same green paint straight lines for the stems & using a pencil draw on leaves and then color them in.

Then I took my carbon paper & put it underneath my printed out wording & traced over each letter for it to show up on my canvas. I then painted over that stencil with pink paint!

I love the verse 2 Peter 3:18, "But grow in the grace and knowledge of our Lord and Savior Jesus Christ.To him be the glory both now and to the day of eternity. Amen." As I was thinking of what to write on my canvas, this verse came to mind & went perfectly. It is also my little prayer for my baby girl! :-)

This was a fun project and I'm so excited to share with you! 

Have a fun, flowery day! :-)


Monday, July 5, 2010

Ribbon Fun

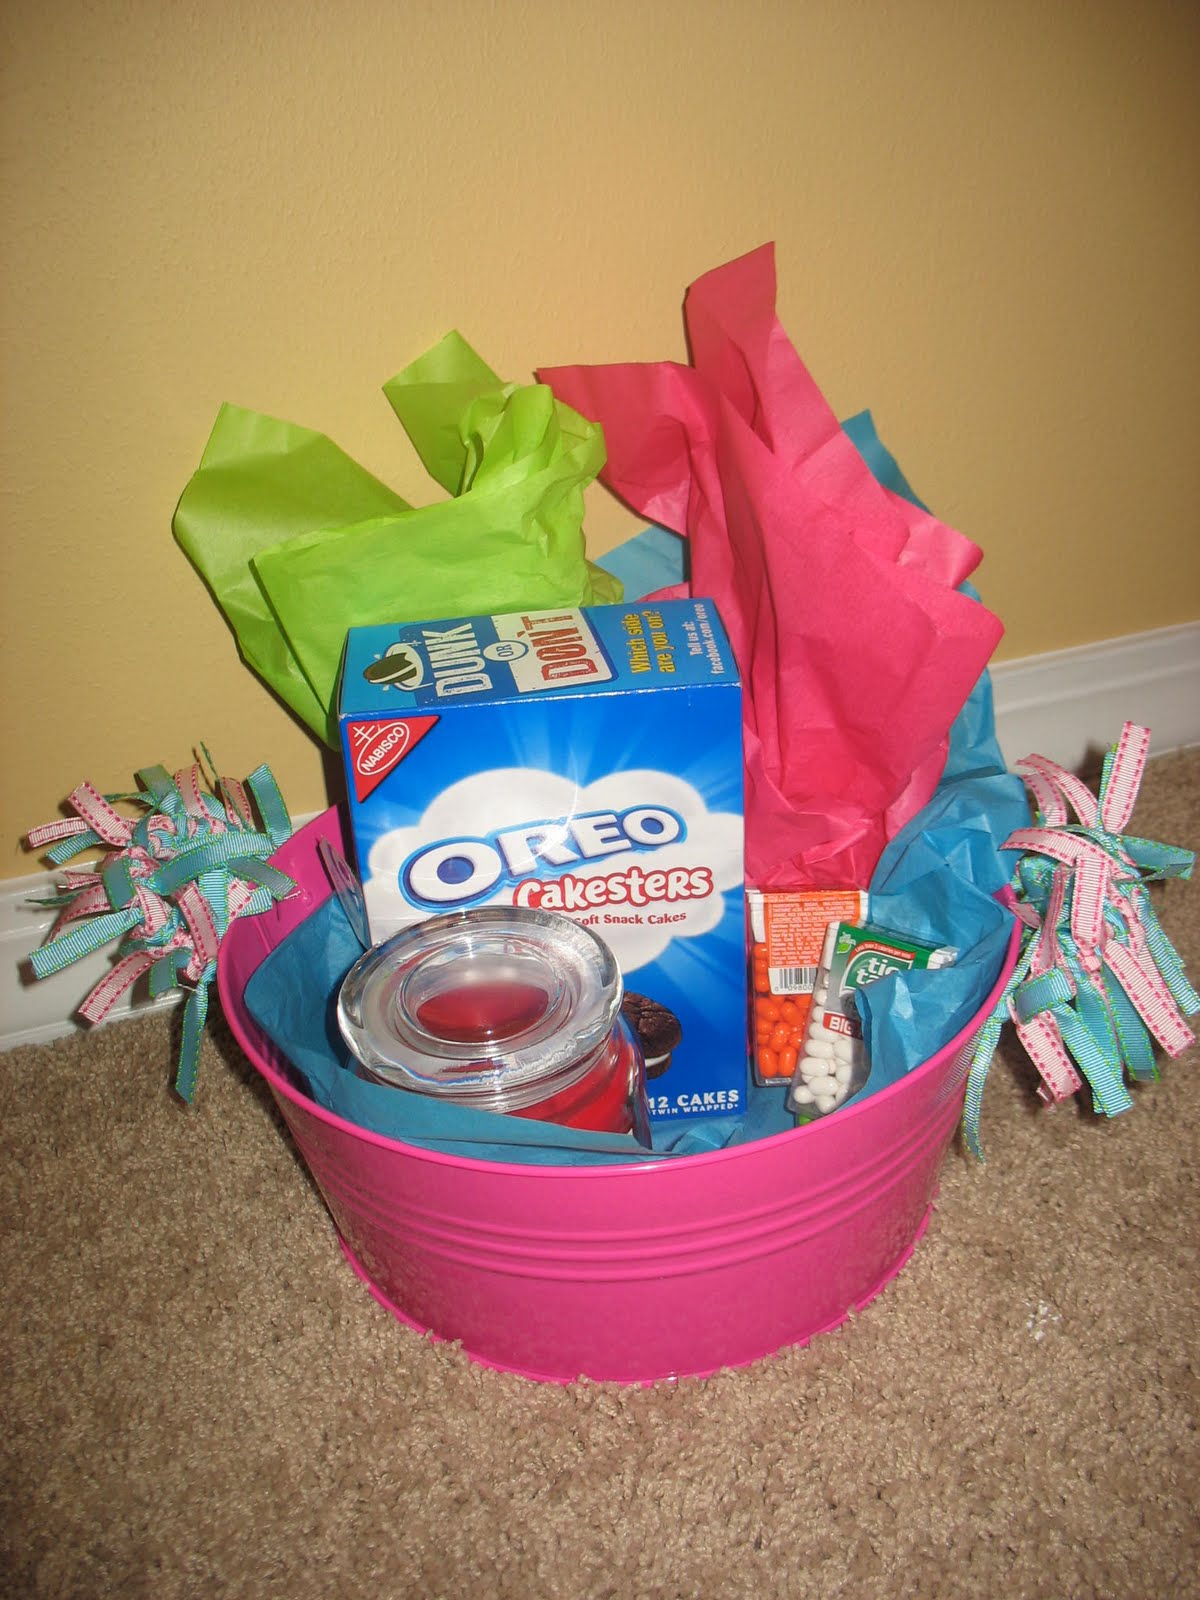
The ladies group at my church have a "Secret Sister" group going on where we give secret gifts to each other  & it has been so fun! We had the reveal a few weeks ago & I thought it would be fun to do something different with her gift. I could have thrown lots of her favorite things in a bag, but I thought jazzing up a bucket with ribbon would be a lot more fun! :-)

It's so easy, you can do it too!

Just head on over to the Target Dollar Spot (I love that place!) & grab a fun bucket!
Then head over to your favorite craft store & pick up 2 spools of ribbon in coordinating colors.
You'll also need a ruler & scissors!
Take your ribbon spools and cut around 13-15 five inch pieces of each color.
Start on one of the bucket handles by tying the ribbons in knots and switching colors every other ribbon.
There's one side done!

Slide them tight & fill it up until there is no more of the handle showing.
Continue with the next handle & you're almost done! :-)
Here's a close up of the ribbons!
Insert tissue paper and lots of favorite snacks & a candle! You have a fun little bucket of goodies that will definitely make your friends day! :-)

**(If you wanted to personalize it you could take matching paint pens & write their name or initials! I ran out of time or I would have! :-) )

Hope this gives you a fun idea! Much better than a bag, right?!?

Thursday, July 1, 2010

Personalized Pillow

Last night I finished up my daughter's personalized pillow to match her bedding & I'm so pleased with how it turned out! I ordered the Personalized Name Pillows pattern from YouCanMakeThis.com (such a fun site!) a few weeks ago & finally got it all finished up! This pattern was very easy to follow and understand. It even helped me in learning more with appliques.


I can't wait to go make up her bed up in the morning & put her new pillow on it! :-)

Monday, June 28, 2010

Charm Pack Cushions

I recently was given a "hand-me down" table & chairs from my oldest sister & it had seen better days and needed some sprucing up! So I after I gave her a solid coat of white paint, it still needed something else.....Cushions!
I decided to make my cushions out of a charm pack. What is a charm pack? It is a pre-packaged set of 5x5 square of a fabric line that you can get for anywhere from $8-$15 at local fabric stores or online fabric stores. This works perfectly for the patchwork look & elimnates alot of the work! :-)

Here's the supplies for my charm pack cushion project:
  • One charm pack with at least 40 pieces (I used Hunky Dory from Moda)
  • 1 yard of 1/2 foam (best to wait when on sale or use coupon! :))
  • 1/2 yard Solid backing fabric

How to make:

First lay out your charm pack squares and select 16 squares (4 squares per cushion) to be the top of your cushions. Arrange them around in the way that you would want the top of each cushion to look.

Then sew together top 2 squares & bottom 2 squares then attach both rows together & you will have the top of your cushion. Repeat more times to complete all 4 tops. (Sorry I forgot to take a picture of this step!)

For the straps, you will use 24 squares (3 for each strap). Cut all 24 squares in half (2.5x5in). Then you should arrange the fabrics as you wish and piece 3 half squares together. Repeat process 15 more times. You should have 16 straps (4 for each chair).

After you piece the pieces together, fold in half, right sides together & sew along the top & side, leaving the bottom open. Repeat 15 times, then sit with your favorite movie on, using a pencil or favorite turning tool & turn each strap inside out & press.


You then need to cut out your back pieces from your solid fabric (9.5x9.5 in)

Lay patchwork top up then lay straps in the top corners about an inch from the side and inch from the top, then lay solid fabric down & sew around using a 1/4 in seam allowance. You should leave a 2 in. opening in the back to insert your foam.
After you have sewn all 4 cushions together, turn right side out & press. Insert foam & hand stitch opening closed. You should come out with cushions that look like this! :-)
So here's the before....
And here's the after:
A fresh new look that I love!

Show and Tell Green
The Girl Creative
BWS tips button